
My name is Alistair Park and I'm a professional carver who is based in Bristol, England. I've been carving for over twenty-eight years and I also enjoy teaching my skills to people of all ages. You'll find posts here about all kinds of things to do with carving; the work that I do, the people that I meet and the things that I see which inspire me. Please feel free to comment on anything of interest, it'd be great to hear from you!
If you like woodcarvings, you might want to have a look.
Showing posts with label knife carving. Show all posts
Thursday, 17 March 2016
A pagan ritual knife handle, carved in oak with a Viking-style wolf's head decoration
It was really enjoyable to do some carving with my Opinel knife recently, when commissioned to make a new handle for a pagan ritual blade. The oak came from a tree that originally grew near Nether Stowey, on the Quantock hills in Somerset.
The Norse-style wolf's head at the end was modelled on an example that the person who commissioned me already had on some jewellery, although I adapted it for the carving. I wanted it to have the look of an object that might have been carved by a Viking carver and to be very comfortable to hold, as well as beautiful.
The end of the handle is drilled to fit a 10mm (0.39") tang.
This image shows the handle against a tracing of the rest of the knife, so that you can get an idea of the scale:
I must admit that I liked the appearance of the carved handle before any finish had been applied. The patina of use would have looked good on it...
...but the finishing gave it a more 'antique' style. A woodworker in the neighbouring workshop said that it looks like it was finished at least ten years ago, rather than two days ago. For the finish, I used pure tung oil (extracted from a kind of nut) and then a mixture of natural waxes. Using natural finishes seemed more appropriate for this particular carving.
I really like the thought that this piece has another, deeper meaning to its new owner than the purely decorative. I hope that you have enjoyed seeing it too.
Saturday, 24 October 2015
Two beautiful handmade knives given to me by friends
Recently, I was given two very different and very beautiful knives by friends. I know that some people reading this are fascinated by well-made blades, just as I am. Perhaps you might be interested to see these ones.
My friends Timo (on the left) and Nat (on the right) are currently travelling as journeymen. Timo is a blacksmith and Nat a woodworker. Timo created the blade at a forge he worked with whilst travelling and also made the stand. He found the antler at a place that he stopped for one night in Berlin and has fitted it to the blade. Even though the handle has the spikes of the antler left intact, it is incredibly comfortable to hold.
The blade is also stamped with marks. The three interlocking circles are Timo's own mark. The eye shaped motifs are traditional markings inspired by the Sami knifesmiths in Scandinavia, which are supposed to protect against bad luck. The knife's shape is also inspired by traditional Sami knives.
Nat worked the piece of copper that covers the end of the handle next to the blade. It is beautifully shaped to fit. When it was presented the blade was deliberately left blunt, as it is traditionally unlucky to give a sharp knife in case the blade cuts the friendship.
Timo's own knife (which he also made) is similar but less ornate. It is also incredibly comfortable to use.
This was the very special moment when the knife was presented by our friends the journeymen.
![]() |
Image copyright and courtesy of Ibolya Feher |
The next knife is quite different, but also very beautiful. It was made by my friend Patrick Small and uses a high quality bought blade fitted to a wooden handle that he has made.
The handle is superbly comfortable to hold and the small blade is designed for the fine shaping of small, handheld wooden sculptures. The small wooden sheath protects the blade when the knife is not in use.
I'm sure that you will agree that these knives are both stunning objects. Thank you to my friends Timo, Nat and Patrick.
Wednesday, 4 March 2015
Meeting Hans-Joachim Seitfudem, master woodcarver from Bavaria, at my studio
Yesterday, my friend Jo Seitfudem brought his father Hans-Joachim to visit me at my studio. It was great to meet him. Hans-Joachim is a master carver in Bavaria, with clients who have previously included the Vatican.
Although Hans-Joachim speaks very little English and my German is very poor, Jo could translate and his father was keen to look around the workshops at Bower Ashton and to see my woodcarving tools. It was easy to see that the wood dust and tools were getting him itching to do some carving himself! He also noted how he likes older British-made carving tools such as Addis and Herring Bros.
My Opinel carving knife felt too large in his hands though; Hans-Joachim said it felt 'dangerous' to him when he used it after his own, smaller carving knife. He also likes to have the cutting edges of his V-tools swept back from the tip, whereas Jo and I prefer them to be square to the tip. Carvers generally do seem to develop a strong preference for how their tools should be shaped. Many experienced carvers that I've met don't lend out their personal carving tools for this reason - breakages and bad resharpening can ruin friendships (although I don't know if Hans-Joachim feels that way).
Hans Joachim said some very kind things about the carvings on the bench for the Bristol Downs that I've been working on recently. He also liked the 'Predator bird' sculpture that he saw in my portfolio.
It was a very enjoyable afternoon and it was very interesting to hear what Hans-Joachim had to say thanks to Jo's translating. I just wish that my German language skills were better!
Making a carved wooden brooch with a celtic design, to be worn as a kiltpin
A kiltpin is traditionally worn pinned to one corner of the front of a kilt. It's not supposed to go through both of the layers of material underneath, as this would make the kilt move badly and could possibly damage the material. Instead it is more of a decoration on the kilt's apron (the flat, unpleated part worn to the front).
The origin of wearing a kiltpin is thought to go back to Queen Victoria using a hat pin to secure her kilted skirt on a windy day. I had made a sgian dubh (the knife carried in one's sock -called the 'hose'- with a kilt) and wanted to make a matching kiltpin to go with it. Obviously, it had to be carved too!
The kiltpin is 50mm (2") in diameter. The yellowish wood is box (Buxus sempervirens) wood, which I picked up whilst out walking in Gloucestershire. Box is a native tree in Britain and a traditional use for the timber is in wood engraving plates. It was the ideal wood for the kiltpin as it is very tough but carves well and can take a good finish. You can see the piece of found wood with the sanded start of the kiltpin in this picture:
It is inlaid with laburnum from the garden of the house that I grew up in - the same wood used to make the handle and sheath of the sgian dubh. Apparently my father would hang a hammock from this tree for my mother to rest in when she was pregnant with me.
There are also three pieces of solid silver inlay and the central setting is a piece of microgranite that originally came from Ailsa Craig. This interesting stone is also set into the end of the sgian dubh and you can read more about it here.
The boxwood was sanded to shape to begin with. The stone to go in the centre was then ground to shape with diamond burrs and polished.
Once the position of the stone setting was known, marked and hollowed out then the rest of the design could be drawn on with a pencil...
... before being carefully carved using my Opinel lock knife. No tricks for that part of the process, just a lot of practice and a sharp blade! The holes for the silver inlay were drilled and then the stone and silver were fixed in with two-part epoxy.
The pin on the back was fixed on using epoxy and three small brass rivets to give extra security.
Here's the kiltpin with the sgian dubh. If you are interested, I would consider commissions to make similar ones. Now I'm looking forward to seeing the knife and pin being worn with the kilt!
The origin of wearing a kiltpin is thought to go back to Queen Victoria using a hat pin to secure her kilted skirt on a windy day. I had made a sgian dubh (the knife carried in one's sock -called the 'hose'- with a kilt) and wanted to make a matching kiltpin to go with it. Obviously, it had to be carved too!
It is inlaid with laburnum from the garden of the house that I grew up in - the same wood used to make the handle and sheath of the sgian dubh. Apparently my father would hang a hammock from this tree for my mother to rest in when she was pregnant with me.
There are also three pieces of solid silver inlay and the central setting is a piece of microgranite that originally came from Ailsa Craig. This interesting stone is also set into the end of the sgian dubh and you can read more about it here.
The boxwood was sanded to shape to begin with. The stone to go in the centre was then ground to shape with diamond burrs and polished.
Once the position of the stone setting was known, marked and hollowed out then the rest of the design could be drawn on with a pencil...
... before being carefully carved using my Opinel lock knife. No tricks for that part of the process, just a lot of practice and a sharp blade! The holes for the silver inlay were drilled and then the stone and silver were fixed in with two-part epoxy.
The pin on the back was fixed on using epoxy and three small brass rivets to give extra security.
Here's the kiltpin with the sgian dubh. If you are interested, I would consider commissions to make similar ones. Now I'm looking forward to seeing the knife and pin being worn with the kilt!
Labels:
boxwood,
granite,
jewellery,
kilt,
kiltpin,
knife carving,
laburnum,
Scottish,
sgian dubh,
whittling
Thursday, 19 February 2015
Making my own sgian dubh (the knife traditionally worn with a kilt)
I'm in the process of buying a kilt and wanted to wear the traditional knife in my hose (sock). Looking at ones online, they were either well out of my price range or looked a bit tacky (covered in thistles and saltires etc.)
Being a woodcarver with a particular interest in knife carving there was no chance that I was going to wear something that impersonal, or carry about a blunt blade for that matter. So I decided to make my own.
The name comes from the Gaelic meaning 'dark knife' or 'black knife'. Although many sgian dubhs (it's pronounced something like 'skee-an doo') will have dark-coloured handles made from ebony or bog oak, the name is thought to reflect the way that the knife was hidden when being worn ('black' in the same sense as 'blackmail' or 'black ops').
There seem to be two main ideas about how the sgian dubh came to be part of Scottish national dress:
The first is that no one with any common sense in the old days in Scotland would completely remove all their weapons when visiting others - things were a bit too wild in the Highlands for that. To show respect and friendship to the hosts when in their house, visitors would put their knife into their hose, so that it was on show for all to see as an expression of good faith (although it could still be accessed in a hurry!). Another knife, called a sgian achlais, would also be worn under the armpit. Wearing the sgian dubh on show symbolises goodwill and friendship combined with an readiness to defend oneself if necessary.
The other influence on wearing sgian dubhs is thought by some to come from hunting. Knives are carried by hunters and ghillies in Scotland, so that deer can be skinned and gutted ('gralloched') in the field and brought back. Trying to get a dead red deer off a Scottish moorland in one piece would be a thankless task; far easier to cut it up first. Gralloching also involves removing the deer's intestines, which means the meat isn't tainted by gut contents.
The traditional design of a sgian dubh has small dimples along the back of the blade away from the cutting edge. I wonder if they echo the saw-type section on the blade of many hunting knives, which I suppose are used to cut through tough parts of a carcass?
Being a woodcarver with a particular interest in knife carving there was no chance that I was going to wear something that impersonal, or carry about a blunt blade for that matter. So I decided to make my own.
What is a sgian dubh?
The name comes from the Gaelic meaning 'dark knife' or 'black knife'. Although many sgian dubhs (it's pronounced something like 'skee-an doo') will have dark-coloured handles made from ebony or bog oak, the name is thought to reflect the way that the knife was hidden when being worn ('black' in the same sense as 'blackmail' or 'black ops').
There seem to be two main ideas about how the sgian dubh came to be part of Scottish national dress:
The first is that no one with any common sense in the old days in Scotland would completely remove all their weapons when visiting others - things were a bit too wild in the Highlands for that. To show respect and friendship to the hosts when in their house, visitors would put their knife into their hose, so that it was on show for all to see as an expression of good faith (although it could still be accessed in a hurry!). Another knife, called a sgian achlais, would also be worn under the armpit. Wearing the sgian dubh on show symbolises goodwill and friendship combined with an readiness to defend oneself if necessary.
The other influence on wearing sgian dubhs is thought by some to come from hunting. Knives are carried by hunters and ghillies in Scotland, so that deer can be skinned and gutted ('gralloched') in the field and brought back. Trying to get a dead red deer off a Scottish moorland in one piece would be a thankless task; far easier to cut it up first. Gralloching also involves removing the deer's intestines, which means the meat isn't tainted by gut contents.
The traditional design of a sgian dubh has small dimples along the back of the blade away from the cutting edge. I wonder if they echo the saw-type section on the blade of many hunting knives, which I suppose are used to cut through tough parts of a carcass?
Is it legal to carry a sgian dubh in public?
A sgian dubh is part of the Scottish national dress, so it is legal to carry one in public in England, Wales and Scotland when wearing that national costume. There are exceptions, such as particular kinds of knife (a flick knife just ain't gonna pass for a sgian dubh). Carrying any blade in security-sensitive places and onto aircraft is also not going to end well. The law may vary in other countries, best to check before heading out!
Making my sgian dubh
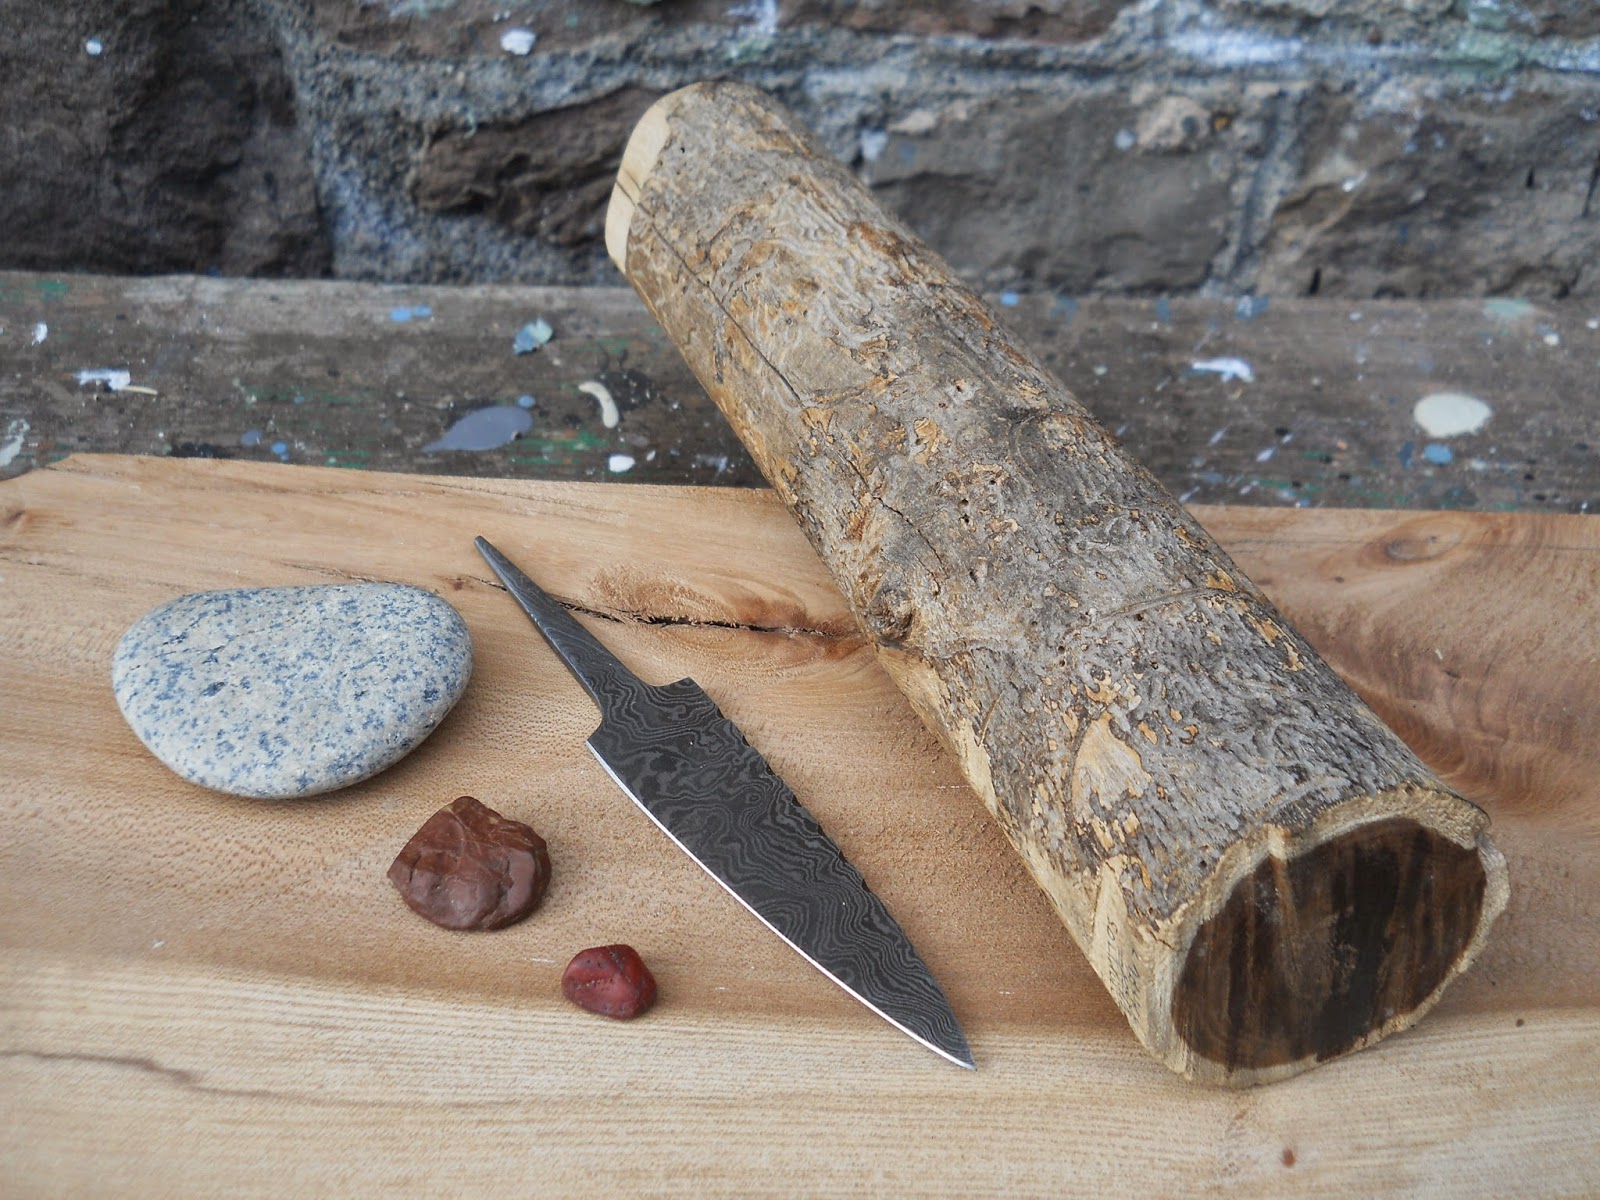
At first, I wanted to try and make the blade for my sgian dubh. However, blade making is a real skill involving knowledge of tempering steels and access to suitable equipment. I didn't have enough time to learn the craft of knifemaking to the level where I would be sure to be happy with the blade in use. I also fancied having a damascus steel blade (where layers of steel are fused together, to make patterns in the blade). Eventually, I decided to buy the blade from Rab and Tanya at Loch Ness Origins. It is carbon steel so will take a sharp edge, although it will need regular honing as it will dull relatively quickly. I think that it might be a bit brittle for very heavy work, but this knife isn't intended for that kind of use.
The sheath and handle were made from the piece of laburnum wood that you can see above. The tree grew in the garden of the house in which I was brought up, so it means a lot to me and has a strong family connection. My father would hang one end of a hammock from it for my mother to rest in when she was pregnant with me. The tree was felled long ago and the house has been sold since then.
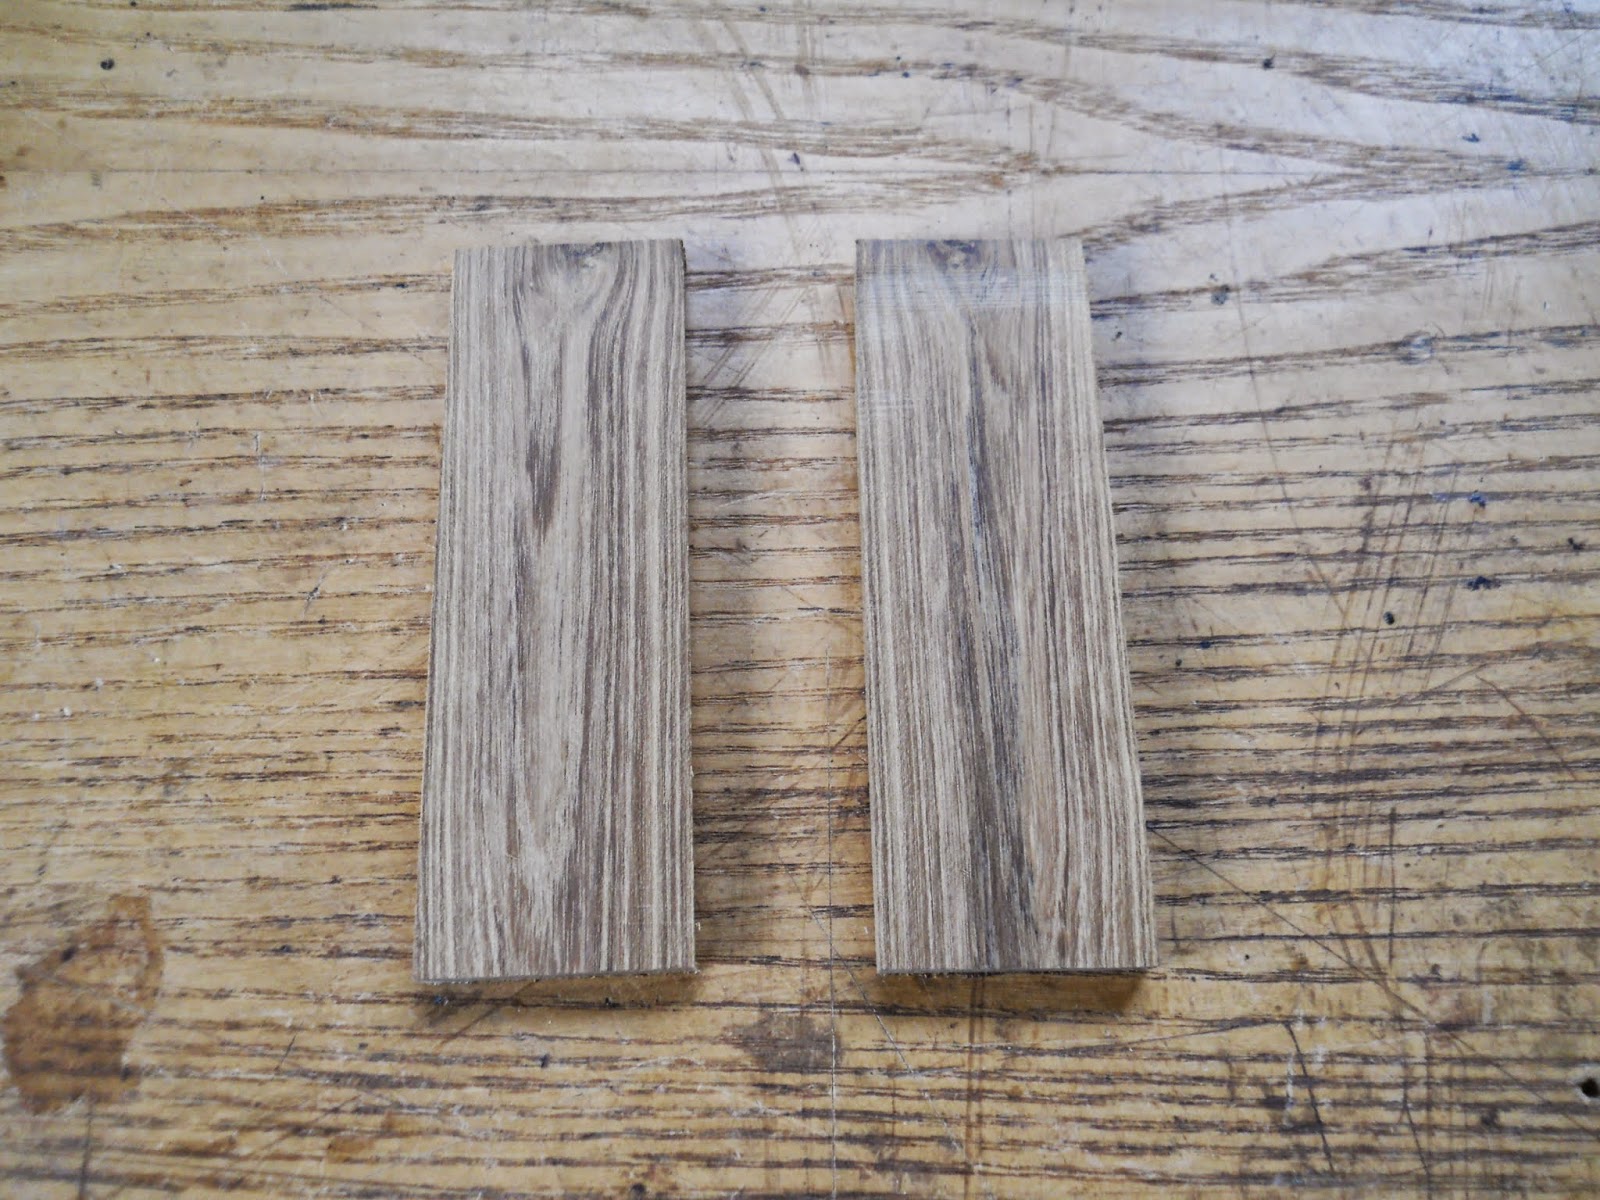
First, the wood for the sheath was cut and sanded to make usable blocks to work with:
The blade was laid onto the blocks and its outline drawn around, remembering to flip the blade over in between so that the outlines and the blocks were a mirror image. I marked the edges of the blade onto the wood at the top and also measured and marked the position of the point of the blade, to make sure that the two sides matched up neatly:
The wood was then carved out carefully, to give the space inside the sheath. The sides corresponding to the back of the blade are slightly more hollowed out, as this part of the blade is thicker. I thought about putting a shim of copper into the sheath to protect it from damage, but decided this might just dull the blade and it wasn't really necessary anyway.
The two halves were carefully glued together using Titebond III and clamped. It took a few goes to make sure that the halves hadn't shifted out of alignment whilst being clamped. Note the bits of paper, to stop any leaked glue from sticking the workpiece to the clamping blocks.
The next day, I shaped the sheath with my trusty old Opinel carving knife, rounding the edges to make it comfortable to wear. The grain of the wood is visually quite striking, so I didn't want too much elaborate carving clashing with it. A simple Celtic knotwork pattern suited the overall design well.
The handle was cut from the same piece of wood as the sheath, to give a continuous grain pattern running through both. I roughly shaped the end to go next to the sheath, so that I could shape the rest accurately and find the precise spot for the blade to be fitted in. With careful measuring, holes were then drilled to hold the tang of the blade. The hole also has a recess to hold the sloping shoulders of the blade, so that it fits in flush to the handle.
Shaping the handle was done with a knife. Using my Opinel was important to me in the process (as it is the blade that I learnt to carve with) and holding the handle as it was being shaped meant that I could constantly monitor how comfortable it felt in my hand.
Once the blade had been fitted and glued into the handle using slow-drying two-part epoxy (I find it less brittle than superglue or Titebond), I noticed that it still moved a little in the sheath. Even though the fit was as snug as it could be, the blade could shift about and loosen itself a tiny bit. I decided to fit a tension spring made of silver (as it would be softer than the steel of the blade) into the sheath. At the same time, a piece of antique ebony veneer given to me by a friend many years ago gave a nice contrast to both the silver and the wood.
After gluing in the tension clip, I drilled a tiny hole and fitted and glued a pin made from silver wire, to give extra strength to the join. The clip is just a piece of flat silver, bent into a slight curve with a bit at the end bent to a right angle for fixing the clip onto a recess cut part-way into the veneer. The curved part is fitted over a shallow recess cut into the inside of the sheath. In hindsight, it would have been easier to fit it before gluing the halves of the sheath together, but it wasn't too tricky to do and the pinned silver does make a nice feature.
I then decided to use a stone to decorate the end of the handle, There were three choices, which you can see in the image above. The piece of jasper at the front was picked up by me from a stream in the Isle of Man. It was attractive but a bit too small. The larger reddish stone was collected from a stream in the Scottish borders. It was the right size and had the Scottish connection, however I wasn't sure about the colour or the strength of the stone itself.
I decided on using the larger, paler coloured pebble. I picked it up on the beach at Peel, on the Isle of Man, in 1988. It is a kind of stone called microgranite containing a mineral called riebeckite and originally came from a small Scottish island called Ailsa Craig, which is in the Irish Sea.
![]() |
Image by Andy Hay, from www.rspb.org.uk |
This kind of rock is rather special. It is used to make the 'stones' used in the sport of curling, with the only other source of material for curling stones being a single quarry in Wales. One company, Kays, has the exclusive rights to collect it from Ailsa Craig but they are forbidden from quarrying by blasting (as the island is a nature reserve), so must pick up stones that are already loose.
I cracked a piece from the stone, then spent a couple of hours trying to find it again after it shot off into a big pile of timber in my workshop! When it had been located again, it was ground down using diamond bits in a Dremel hand drill (not forgetting eye protection, dust extraction and a face mask) and then polished with jeweller's rouge. The groove around the stone will hopefully make it easier to set onto the handle, while the cross-hatching will give a key for the epoxy adhesive that I'm planning to use.
After shaping the stone, I discovered that the island of Ailsa Craig has other names, one of which is Creag or Carraig Alasdair. It means 'Alasdair's Rock' in Gaelic; very appropriate!
At this point, the parts of the knife looked like this:
The next stage was to make silver ferrules, one to go around the handle next to the blade and another holding the stone in place. Again, I didn't have the time or the equipment to do a more technical silversmithing job like this, so I contacted local silversmith Amy R Lee. She made two beautiful silver ferrules and also sent them to Edinburgh to be assayed and hallmarked at the assay office there; a nice extra touch.
When the ferrules came back, the knife was assembled and then sharpened. It has taken a very good edge and is razor-sharp now, perfect for whittling with! I also finished the wood with a furniture wax and buffed the blade. I'm very happy with it and I hope that you've enjoyed seeing how it was made.
Front |
Reverse side |
Friday, 29 August 2014
Teaching woodcarving with a knife at my studio in Bristol, together with some thoughts about whittling
Yesterday, Jack came to my studio to learn how to carve with a knife. We had a great day and he wasn't the only one learning new things. He told me about a very interesting video of a talk by Denis Dutton, part of which concerns prehistoric stone tools that were possibly made solely to show the maker's skill; very interesting to a craftsperson!
The knife is one of the most versatile tools for a carver. It was clear from watching Jack's progress that the knife work taught many lessons in working with wood that are transferable to using all other edged carving tools: working with the grain, the importance of the slicing cut, sharp blades being vital etc. These points are fundamental to a carver, they certainly aren't trivial things to learn.
The use of a single carving tool to make a complete sculpture is also a good carving exercise. My friend Jo Seitfudem told me once about his father, a master carver in Bavaria, giving him a single gouge and telling him to carve an entire sculpture with it. Without a range of tools to use, the importance of working with the timber itself to achieve a finished piece is much clearer to a novice carver.
A look at the work produced in regions that regularly use knives as a basic carving tool (Africa, Papua New Guinea) also easily illustrates that carving snobbery about their use is just narrow-mindedness.
Here's a photo of the walnut pendant that Jack carved during the session, We agreed that it looks great and it seemed to capture just what he was aiming for, with the tooled finish and the delicately carved spiral that he achieved:
It's interesting how the process of teaching a skill can so often lead to the teacher learning and seeing their speciality with fresh eyes too!
Jack sent me an email afterwards saying how much he had enjoyed the day and learning a new skill. It also made me think about whittling as carving. Some carvers can be dismissive of whittling with a knife, thinking that it is an 'inferior' kind of carving. This teaching session was a strong reminder of just how daft that view is in my opinion.
The use of a single carving tool to make a complete sculpture is also a good carving exercise. My friend Jo Seitfudem told me once about his father, a master carver in Bavaria, giving him a single gouge and telling him to carve an entire sculpture with it. Without a range of tools to use, the importance of working with the timber itself to achieve a finished piece is much clearer to a novice carver.
A look at the work produced in regions that regularly use knives as a basic carving tool (Africa, Papua New Guinea) also easily illustrates that carving snobbery about their use is just narrow-mindedness.
Here's a photo of the walnut pendant that Jack carved during the session, We agreed that it looks great and it seemed to capture just what he was aiming for, with the tooled finish and the delicately carved spiral that he achieved:
It's interesting how the process of teaching a skill can so often lead to the teacher learning and seeing their speciality with fresh eyes too!
Subscribe to:
Posts (Atom)