Tuesday, 29 January 2013

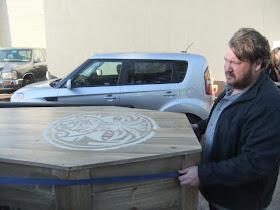
Carving a self portrait in wood for 'Cornucopia' at the Grant bradley gallery in Bristol

I've been invited to exhibit in this show, which runs from the 9th February 2013 to the 2nd March. It seemed like a good opportunity to make a new piece of work, so it's also been a chance to get going on a project that I've been meaning to try out for a long time - a self portrait.

Self portraits are great in some ways, as the model is always there and works for free! However portraiture of any kind isn't easy and with a self portrait, the maker is presenting a bit more of themselves to the world in the work than usual.

The wood used

The timber used is a piece of Lawson cypress, which came from one of the 'big trees' felled at Ashton Court in Bristol five years ago. Although a lot of people seem to think they were all Wellingtonias, the local tree officer confirmed that this was a Lawson cypress. This photo shows the felled trunks where they had been left in front of the mansion.


The felling was part of a scheme to restore the estate to its original Humphrey Repton design, but was heavily criticised by some at the time. It's nice to be able to use a bit of one of these trees from Bristol's heritage for a creative purpose, rather than the timber being wasted. The wood carves okay, but you need very sharp tools and it takes a bit of time to understand how to work it so that bits don't chip or flake off.

Carving the self portrait

First of all, I needed some decent reference photos, which my partner took. Then, the chunk of timber used needed to be cut into a squared block to make it easier to work on.


I then transferred the outline from a couple of the images of the same size onto the block (face-front and profile), giving the outlines needed to bandsaw a rough shape out:


After that, it was a matter of drawing in the centre line for the face on the roughed out block, drawing approximate positions for the features (ears, eyes etc. measured off the original photo) then carving out the rough form, using a large number 6 gouge to start with. 
I also drew the centre line in the same place on the reference pictures, to give a point to measure off from.


It's a good idea to keep the carving quite general at first - no big undercuts - so that features can be moved about a little bit as carving progresses. Keep features such as noses larger than you need at first and then sculpt them down bit by bit. If you dig in deeply, its hard to move features about later on.

I like the idea that its best to 'creep up' on a portrait face- not to go straight in hacking out the main parts, but instead work the whole sculpture down slowly until the features kind of fix themselves.
Peter Benson talks about someone describing starting a carving as being like seeing a shadowy figure in a dark alleyway. As one carves, 'the vague shape is achieved and, as the light in the alleyway gradually increases, the form slowly becomes more obvious until all the detail is clear.'


The closed eye was the first to be carved, just because I was impatient to have a go at it. That's one of the reasons that I chose a winking face. The technical challenge, trying to capture the facial contortion of winking, appealed a lot. Also, many carved self portraits seem to be 'neutral-expression-facing-forward', which seemed a bit boring to carve to be honest.


Whilst working, the reference photos were in front of me, together with a mirror. The other tool that came in useful was my phone camera. 
Why? Try looking at your own ear, in detail, in a mirror placed in front of you!


Work became a bit more tricky when we had snow, which meant buses stopped running, driving was dangerous and the journey to my studio became a ten mile (about 16 km) round trip on foot on treacherous icy roads. Still, it was worth the hassle. Even so, eventually I had to bring everything back to my house in a large backpack to make life a bit easier. 

The hair at the top of the head needed to be sculpted using a Dremel hand drill fitted with tungsten rotary burrs, as even the most carefully sharpened tools seemed to tear the grain of this timber when cutting straight across it. 

The beard was a bit of a puzzle too. I had left a raised area of wood to show the beard's shape. At first, I tried carving sharply defined V tool lines in curves to show the direction of the hairs, but it didn't look right. Carving less sharply defined gouge marks gave a much better result. After all, most people don't see every individual hair in someone's beard.

Areas of skin were sanded to give a nice contrast to the hair, beard and jumper.

As the carving progressed, I noticed a strange effect coming from copying the reference photos. The face was more pronounced and the ears, for example, were hidden away behind it. I think of it as the 'Chuck Close effect', after the American artist who paints large portraits from photos and has discussed the facial distortion that this process gives to the paintings. 


The thing is, I like the effect! The face is slightly caricatured, but that seems to suit the mood of the piece. If you don't want that effect in your own carving, it might be better to take photos from further away in good light with a tripod and then use the zoom to focus in.

The Finished Piece


The carving is about 24 centimetres (about 9½ inches) tall and has a small carved plaque in the base, saying what the wood is and where it came from. It took a little over 42 hours to make, from start to finish. 

Thursday, 24 January 2013

Fitting a new window in the roundhouse's cordwood wall


There has been a bit of a break in fixing the roundhouse roof, thanks to some heavy snowfall (a note to readers in Canada, Scandinavia and other areas used to snow- more than a couple of inches (5cm) of snow in the UK and everything comes to a grinding halt).

(No, really!)

In the meantime, we decided to fix the window which was broken by the weight of the overladen roof pressing down on it. See the post at http://carvingswithstories.blogspot.co.uk/2013/01/fixing-boiling-wells-roundhouse-roof.html for the full story...

 Anna and I, together with the young people that are volunteering through their schools to help on the project, assembled a new window in the Boiling Wells barn last Tuesday.


The previous day I had collected together some offcuts of  European Larch from my workshop and routed a groove along each one to take the replacement toughened glass double glazed unit, which had arrived at the farm site. The volunteers and I then cut simple mortice and tenon joints to join them together . The assembled frame was finished with linseed oil and left to dry.We also had enough time to make pizzas and cook them in the wood-fired pizza oven. Yum!


When assembled, the frame looked great!


Today, Simon and I fitted the window into the roundhouse wall. It was a bigger job than it sounds!

The previous window was a glazing unit slid into slots cut in the surrounding cordwood logs. There was a lintel made of three sweet chestnut sticks, the central one of which was also grooved to take the top of the glazing. The adjacent, surviving window was put together in a similar way, which you can see below.


To fit the new window, we needed to brace up the sweet chestnut stick lintel, as it supported the cordwood wall above. We then had to the rip out the surrounding notched logs (many of which were nailed to nearby posts) in order to make room for the new frame. The wall underneath also needed to be partially rebuilt, to give a level surface for the window frame to sit on.


We put in a temporary brace, then inserted two sweet chestnut poles to make new lintel bearers. We also thought that leaving the old lintels in would give more support to the wall above and protect the new window from going the same way as the old one...


We could then fit the new window, using builder's metal strap to attach it to surrounding logs and posts securely.

Cheese!


Finally, we mashed some of the removed dried cob with water to make it reusable and started to fill gaps around the new window with a central straw insulating core and cob on the outer sides. 


We need to finish putting the cob on (nightfall stopped work) but the new window looks great! To be honest, we all prefer it to the one slotted into the logs. The contrast between the straight lines of the frame and the cordwood wall looks better and less slapdash than the previous window. It is also easier to remove and replace the window if needed (important in a community-used space).


 I'm quite tempted to put a couple of layers of lime render over the cob in the cordwood wall eventually, as it looks neater in my view (although the metal builder's strap may need to be protected from the corrosive lime mix). It will also fill some of the gaps left by the unseasoned logs originally used, which have shrunk as they seasoned. Some can now be pulled out of the wall completely. 
The logs should also really have been debarked before being used in the original build but time was tight for the Shift Bristol crew who built the roundhouse and so some things couldn't get done.

Before lime rendering, I'd also like to spray a borax solution over the logs in the cordwood walls as a mild insecticide. Some of the cordwood logs used are from fruit trees such as plum, which will probably get hammered by woodworm pretty soon if nothing is done to protect them.

So Simon and I had a pretty busy day today! However, the snow did come in useful in one way. Since there were no groups of young people on site, we could keep our incentives to finish the job nice and cold until work was done and we could enjoy them...


Next job, finishing that roof!


Wednesday, 16 January 2013

If you think that you find it hard finding a space to carve....Andrew Wodzianski's 'Self Portrait of the artist as Ishmael'


I just saw an article about this piece of performance art by Andrew Wodzianski, called 'Self portrait of the artist as Ishmael'. He sat on a replica coffin floating in a swimming pool for 36 hours to replicate the end of the novel 'Moby Dick' and also managed to produce what looks like a pretty decent carving on it in the meantime! Hats off to Mr Wodzianski for his endurance.
Obviously not a man worried about his carving tools getting rusty.


(Apparently, that's not him carrying the coffin in the picture above)

You can see more about this artwork at the site which these images came from:
http://www.tikiroom.com/tikicentral/bb/viewtopic.php?topic=43999&forum=1

The artist also has a site at:
http://www.wodzianski.com/ 

Monday, 14 January 2013

Fixing the Boiling Wells roundhouse roof

Over the last week, I've been hard at work repairing our roundhouse roof.
It was originally built with a very steep pitch and the turves laid on it were about 12 inches (30 cm) thick in places with little drainage. As they got wet, the weight of the roof grew until it pressed down hard enough to break one of the windows!


There was also a problem with drip points from the roof going straight onto the ashwood rafters, which were beginning to rot as ash isn't durable when repeatedly soaked outdoors. 
This was making the roof potentially dangerous as the screws holding the fascia boards on were close to failing, which could have allowed tonnes of earth to cascade off the roof.

 So, a bit under two years later, we have some insurance money to finally try and get it right!
The first task was stripping the roof back to the underlying timbers. We discovered that the original builders had built it with slab wood overlying the ash rafters, then carpet, then straw, then damp proof membrane gaffer (aka duct) taped together, then another layer of carpet then finally turves dug up from around the site.
The turves came off fairly easily by just sliding them off on the underlying carpet. Digging the resulting piles up and moving them about the site was a lot harder!


 We then stripped the black plastic damp proof membrane off and saw it had ripped in a few places. We will replace it with EPDM pondliner, as this is more durable although more expensive. Under the plastic was the straw and then more carpet. These both acted as insulation and will be replaced when relaying the roof.


By the end of the fourth day, we had stripped the roof, fixed in concentric terracing timbers (to try and give some break in the roof gradient and stop material creeping down the slope), relaid the insulating carpet and covered it all with the DPM to keep it waterproof until work can recommence next week.


Many thanks to Oisin, Amrik and especially Simon for all their hard work and help this week.

Sunday, 6 January 2013

Lime rendering a strawbale wall- a few things learnt at the Boiling Wells roundhouse in St Werburghs, Bristol

A few of us farm staff are about to get on with sorting out the roundhouse at the St Werburgh's City Farm's Boiling Wells site, which has been looking decidedly sorry for itself of late. We will have help from some volunteers and young people and I'm really looking forward to getting it shipshape, so that we can really start using it properly.


I thought I'd write a bit here about what we learnt when lime rendering the construction's strawbale wall in October/November 2011.
The roundhouse was originally built by a group called 'Shift Bristol' and they put a lot of hard work into making it. They were advised initially by Tony Wrench, who has made his own roundhouse in Pembrokeshire (see www.thatroundhouse.info). Unfortunately, Tony couldn't be there for the whole build and time was really tight for the project, so inevitably some things didn't work out as they should and the roundhouse was left not quite finished.
Since a lot of the people who helped on the build have moved on, they won't get to learn what we found out by trying to finish the jobs off.  In writing this, I hope that they and other people will be able to avoid some of the mistakes we encountered and it will help make their future lime rendering projects easier!!

How the strawbale walls were constructed

The strawbale wall only makes up about a third of the total wall area of the roundhouse. The rest comprises door spaces and walls made from cordwood and bottles held together in a cob matrix, with straw stuffed into the centre of the wall between the logs or bottles.


We have had some trouble with logs shrinking as they season and working themselves loose from the cob matrix, even falling out.
The walls aren't loadbearing - the weight of the roof is taken by a wooden 'henge' which is then filled in with strawbales etc. You can see the assembled henge frame and the rafters for the reciprocal roof below:


The base of each wall section is an old railway sleeper laid flat on the ground. It's hard to tell if there is a membrane on top of this, or if the treatment already in the sleeper is being used to prevent water travelling up from the ground into the wall itself (I wasn't around when the strawbale wall was built by the group). Strawbales have been put on top of this sleeper, with hazel spars pushed in and holding them together. When we came to render the wall, it already had a thin covering of smeared clay to prevent rats nesting in it (the site is on a terracotta-type clay and is in an urban area).


Why lime render?

We wanted to use lime render as it allows a certain amount of movement within the wall and also lets it 'breathe',  important with an organic building material such as straw, whilst still being waterproof. Cement render would be too brittle and eventually crack as the strawbales moved slightly under it. Clay render was  too soft and could be damaged easily when dry, as well as being susceptible to damage from rain. 
Lime render also looks good but needs to be handled with caution. The mix is very caustic and can make your skin very sore. It's best kept out of your eyes too! Be careful not to let it sit around on any decorative wooden areas as it will bleach them. 

How we'd do it next time...

I've got to thank Rik Lander at this point for giving us his help and advice. You can see the beautiful studio that Rik constructed at http://bristolgreenhouse.co.uk . The site also has a lot of useful links and advice on building using old tyres, hempcrete etc.

Strawbale tips

For more on how to build the strawbale wall itself, you'll need to check other sites. I can only give a few thoughts, as we took things on when the walls were already built...

First, make sure that the strawbales have the cut ends of the straw facing outwards. The long sides of the straws don't allow the render to grip to them very well, whereas the cut ends give a good key. If your wall is thinner than the length of a whole bale, you could cut the bales in half with a saw (or chainsaw) before setting them in place, but they may need some extra baling twine wrapped around each half first, to stop them falling apart. Cutting in half will also, of course, reduce their insulating properties.

When the wall is assembled, trim it to remove any overhangs and jutting bits using a chainsaw, old kitchen knife etc. but do it before you apply any clay render. It's frustrating work trying to get lime render to stick underneath an overhanging bit of bale, but not quite annoying enough to sacrifice a chainsaw blade on clay-covered walls. I don't know if the clay render made applying the lime render over it any easier, but it kept the rats out in the meantime.

The Lime render recipe that we used:

Each mix comprised:

2 buckets old render (a mix of 12 shovelfuls irregular grain sized (coarse to fine) sand, 2 shovelfuls lime putty and 4 handfuls of sawdust) I got this recipe online, but it just doesn't work. The render was far too brittle. However, we scraped it off the walls, broke it up a bit and put it back into the new mix. 
You can do this with any old lime render (even after many months or even years!), put it into the new mix and it often works better than fresh-mixed stuff. If you want to revive a batch of just dried out old render to apply it, put it in the mixer with a tiny amount of water and it will be fine.

1 bag builder's sand (medium, regular-sized grains). For those in the UK, sand from Travis Perkins performed much better than that from Jewsons. Sand with very irregular grain sizes doesn't key together very well in my experience.

1 shovelful lime putty. Add a little at a time to ensure it mixes in.

1 bucketful of hydraulic lime powder (NHL 3.5). Lower numbered limes are better for rendering on straw as they are more flexible.

approx. half a bucketful straw, cut into 1 inch (2.5 cm) long pieces. Longer bits don't work well during application. The first layer of render applied needs straw in the mix to help it bind together, but the second layer onwards don't need it.

approx. 1 bucketful water. Add this in small amounts. Too much water will make the mix prone to cracking, you want enough to make it workable and no more.

***
Three of these mixes covered about 5 metres square (about 16 and a half square feet). Each layer was about half an inch (1.25 cm) thick.

Mixing the render


Get a cement mixer. Don't do it by hand unless you are a mixing machine with arms like treetrunks. 

The moment we realised we were going to need a cement mixer
Top loading drum mixers are better than front loaders, as the render tends to bind together in an unmixed lump in front loading ones and putting halfbricks in didn't help sort that out either. It's very important that the render is evenly mixed with no lumps of sand or, especially, lime putty. Remember to check that it's mixed at the back of the mixer too...
Put a big board under the mixer to protect the ground from the harsh, alkaline render.
Be careful when adding the hydraulic lime dust. Don't inhale it and keep it out of your eyes. You may like to wear a dust mask, or fix a bit of plastic sheet over the mouth of the mixer with a bungee to stop too much coming out again when mixing.
The longer the render mixes for, the 'wetter' it becomes. Don't be tempted to add too much water early on, let it mix for a while then add in small amounts.
To see if the render is ready, check that there are no lumps, take a handful and chuck it at the rim of the mixer. It should feel workable, but not wet, and it should stick to the rim.


Applying render

Don't use metal staples etc. to key the render onto the wall, as the lime will corrode them.

Make sure you are wearing old clothes and sturdy rubber gloves and wear safety specs - you don't want this stuff in your eyes! Cover any cuts as lime will interfere with healing. We kept some clean water handy, in case any eyes or skin needed to be washed. Spread old tarpaulins on the floor to protect the ground underneath and to catch falling render, which can be added into the next mix.

 First, moisten the wall slightly to help the render stick. Then, take handfuls of the render and push it into the straw walls with a kind of massaging, circular action to get it right in. The first layer will have bits of straw sticking out, but they can be covered by subsequent layers or trimmed later. After about a week the next layer can be applied.
While drying, protect the render from hot direct sun and, more importantly, from frost. In hot climates, hanging hessian in front of the render and then keeping it moist may help avoid problems caused by over- rapid drying.

Finally, paint over a couple of washes of lime putty mixed half and half with water to make a 'slip'. If you don't want the finish to look dazzling white, you can add a bit of acrylic paint. I used some yellow ochre from  a small tube of artist's acrylic and it gave a very nice yellowish tone to the final finish.


I hope that's useful to any readers thinking of using lime render. Ours has now been on the roundhouse wall for over a year and is still going strong. We haven't had any problems with cracking, flaking off etc. Good luck with your own projects!

Wednesday, 2 January 2013

Grinling Gibbons in Bristol - a hidden treasure and a woodcarving mystery

On a quiet afternoon, head into Bristol's Central Library on College Green and head upstairs to the Reference Library. If it isn't too busy and you ask nicely, one of the librarians at the desk will be happy to show you into the partially-visible room next door, which is called the 'Bristol Room'.

When you enter, it's like stepping back in time. When the new library was opened in 1906, books and shelving from the old library building on King St were brought here and put in this room. The original library (built 1738-1740) is still standing, it's Palladian grandeur now housing the Cathay Rendezvous chinese restaurant. These books are not the only treasures held in the Bristol Room though...

One of the more worn-looking chairs in the room was apparently the seat used in one of the 'Bloody Assizes' by Judge Jeffreys. The infamous 'hanging judge' is mainly remembered for his heartless and brutal sentencing of those involved in Monmouth's rebellion of 1685.

Judge Jeffreys
image from freepages.genealogy.rootsweb.ancestry.com/


Grinling Gibbons
Image from a portrait in the National Gallery via Wikimedia


Nearby is another historic wooden construction, the one that the title of this blog post refers to. Over the fireplace is a stunning, carved oak overmantle. The lifelike carvings of fruit, game birds etc. could only have come from the workshops of Grinling Gibbons, probably the greatest woodcarver who ever set up studio in Britain.

image copyright owner unknown

The overmantle was bought in 1721 (according to Pevsner) in a sale at Gibbons' studio. The buyer was Michael Becher, sheriff of Bristol in 1739 as well as being master of the Merchant Venturers. He donated it to the library when it existed in it's original home on King St.
The woodcarving around the fireplace itself is quite different in style and is thought to be from a different workshop to Gibbons.

So what's the mystery?

Well, Grinling Gibbons was renowned for working in lime (aka linden) wood (Tilia species). So renowned, in fact, that his name is pretty much associated with carving in lime wood. Lime is the timber of choice for many European carvers as it is readily obtainable, reasonably (but not too) hard and it doesn't have a strong grain. This means it is less likely to split in carving, can take fine detail and also shows that detail well, which strong grain patterning would tend to obscure. All very desirable when carving with the kind of detail that Gibbons' workshops specialised in.
Oak (Quercus species) is much more tricky to carve intricately. It's strong grain can easily split chunks off and the wood itself tends to be tougher. The strong grain pattern and figuring could also easily obscure very fine detail.


The mystery is... why is this carved overmantle in Bristol not better known? There is carved oak work by Gibbons' studios in St Paul's Cathedral in London, but generally it is not nearly as commonplace as his carved lime work. It is really surprising to me that images of the overmantle are currently so hard to find online and even David Esterly's excellent book on Gibbons, 'Grinling Gibbons and the Art of Carving', doesn't mention the overmantle at all.

You can see some more photos of the overmantle by clicking on the link to this, more recent, post:
http://carvingswithstories.blogspot.co.uk/2013/02/some-closer-shots-of-grinling-gibbons.html

It is hard to see how carving of this quality could be from anyone but Gibbons' workshops and other carved wood work from around this time in Bristol just doesn't have the finesse or exuberance of the overmantle. Some examples of roughly contemporary carving work in Bristol are swags carved in Quebec Yellow Pine in the Royal Fort House, which is usually open on Bristol Open Doors weekends. These were created by carvers under the direction of Thomas Paty between 1758 and 1762 for Thomas Tyndall, a wealthy merchant, and Alicia his wife.


Carved ornament in the Royal Fort House by Thomas Paty's woodcarvers


So if you are around College Green in Bristol and want to see a real little-known masterpiece of woodcarving, go and ask to see the Bristol Room. But please, for the sake of the hardworking librarians there, don't all go at once!